Sour Cream and Onion Sweet Potato Chips (Microwave)

Seasoned Chips

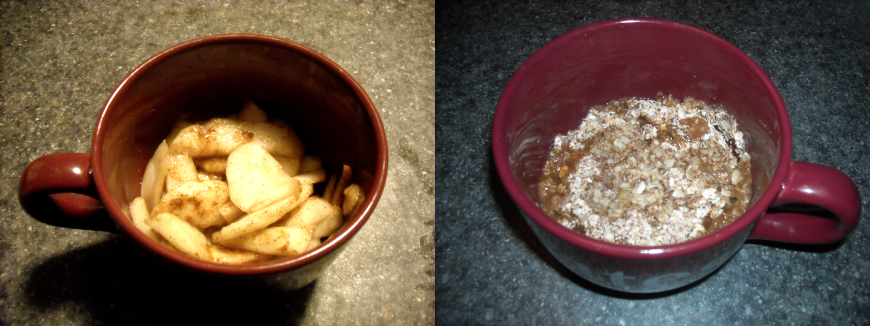
I have an admission to make: I love snack food. That probably doesn’t come as too much of a surprise since most people love snack food, but for me it’s become a bit of a problem lately. Since I’ve gone on this wheat and corn free diet, my asthma and allergies are substantially better, but the number of available snack food options is significantly worse. Just about every product on the grocery store shelves seems to contain some derivative of one of these products. Can anyone explain to me why Sour Cream and Onion potato chips need to contain not one, but TWO different corn based products?

My first solution was roasted chickpeas. Did you know you can make them in the microwave in 12 minutes instead of the hour or so it takes in the oven without heating up your house in the middle of the summer? Amazing! (I’ll post more on that sometime soon.) Sadly, I can only handle so many chickpeas in a row before I start longing for potato chips again. I miss the perfect crunchy instant snack, but I do not miss the preservatives and additives or the unhealthily high fat content.

Luckily, I came across a couple of blog posts recently that changed everything. The first was for microwaved zucchini chips, and the second was for a dry mix for sour cream and onion roasted potato wedges. Finally, I found this post by bubbly nature creations for Sour Cream and Onion Veggie Chips, and I knew what I had to do! The combination of the tangy seasoning with the lightly sweet chips is perfectly balanced. Hopefully you’ll enjoy them as much as I do. They don’t taste like commercial Sour Cream and Onion chips, but they are definitely delicious!

Ingredients

Ingredients
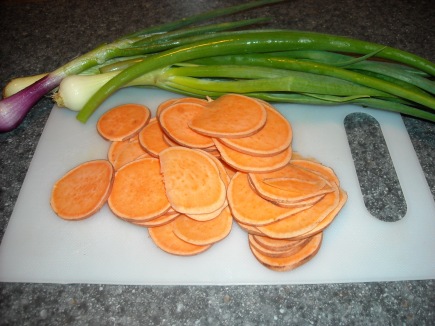
1 Sweet Potato, thinly sliced
1/3 cup powdered buttermilk (found in the baking aisle near nonfat dry milk)
1 tbsp. kosher salt
2 Tbsp. Parmesan, finely grated (or the canned)
1/2 Tbsp. Onion powder
1/2 Tbsp Garlic powder
Spritz of oil, optional*
Dried Chopped Chives for garnish, optional*

On Parchment Chips

Mix the powdered buttermilk, salt, onion powder, garlic powder, and Parmesan together in a small sized bowl. Place the sweet potato sliced in a single layer onto a parchment lined microwave safe plate and spray lightly with oil. Microwave slices of similar diameter together to prevent burning (larger slices will take longer than smaller slices). Microwave on high for up to 6 minutes, checking at 4 minutes and in 30-60 second increments thereafter until the veggies have started to brown. Wait until they brown a little (darken in the center) or they will not crisp up, but be careful not to over-brown or burn them. Sprinkle seasonings over potato slices (use a mesh strainer for this), and sprinkle with the chives if desired. These can be eaten right away or stored for up to a day.

Homemade Microwave Chicken Pot Pie

I love mug cooking, but with the exception of macaroni and cheese, I can’t find many savory recipes. Most of them are great for breakfast (Blueberry Muffin in a Mug) or dessert (Minute Brownie in a Mug), but not for dinner. I started hunting for a microwave recipe for chicken pot pie, but apparently no one has been quite that brave. Even after broadening the search to any single-serving microwave pie, I still came up empty handed. The few that called themselves “pie” were actually little more than fruit with some oatmeal crumb topping.

I knew that it had to be possible. Connie Stewart finally gave me the information I needed to figure it out. I have to admit that this isn’t a true microwave recipe because I finished mine up in the oven to get the golden brown color I’m used to seeing on a crust. However, that’s not absolutely necessary and it tastes great either way.

It works! Homemade chicken pot pie can be made in the microwave!

It works! Homemade chicken pot pie can be made in the microwave!

I’ve been making white sauce on the stove since I was knee high to a grasshopper, but I wanted to make this as simple as possible so every part of the recipe can be made in the microwave. I used leftover chicken and frozen vegetables to speed the process, but you could cook chicken in the microwave while you dice up fresh vegetables and prepare the rest of your ingredients. The recipe includes the crust, white sauce, and filling. It may seem a bit overwhelming at first, but it really comes together quickly.

Ingredients:
Crust:
1/2 cups flour
1/8 teaspoon salt
4 Tbsp unsalted butter (1/2 stick), cut in pieces
scant less than 2 Tbsp ice cold water

In a small bowl, stir together flour and salt. Add in cut butter. Work the butter through your fingers, massaging it until the mixture resembles coarse crumbs with pieces no larger than the size of small peas. Drizzle ICE COLD water over the flour butter mixture and swirl the bowl around until the water is coating everything. Gather the dough together and press it into a rough ball, don’t really knead it, just gather and flatten once or twice. It’s easy to overwork the dough at this stage because it is very crumbly and seems like it can’t be right. Trust me, it works; don’t gather and flatten it more than 2 times.

Flour your board or counter and dump the dough onto it. Cover with a sheet of parchment paper and let it sit for 10 minutes. If you’re kitchen is warm you may want to let it do the sitting in the fridge.

While the dough is chilling, make the white sauce and assemble the filling.

Making the RouxWhite Sauce:
1 Tbsp butter, melted
1 Tbsp all-purpose flour
1/2 Cup milk
Salt and pepper, to taste

Melt the butter in a microwave safe 1 quart bowl on high for 15 to 30 seconds. Stir in the flour until blended and smooth. Stir in the milk, salt and pepper.

Microwave on high for about 2 minutes. Stir and microwave on high for 1 to 2 minutes more or until thickened.

Filling:
1/2-2/3 Cup diced mixed vegetables, fresh or frozen
1/2 Cup cooked chicken (may substitute canned, drained)
1/2 Cup prepared white sauce

Place the vegetables in a microwave safe bowl with just enough water to cover the bottom, and microwave on high for 2-3 minutes. Drain the vegetables.

Combine the vegetables, chicken, and white sauce, and set aside.

Pie CrustTo roll out the dough: keep the parchment paper on the dough and roll or press the dough into a rough rectangle. There are going to be bits and pieces of dough falling everywhere-its ok, just stick them back in and keep on doing your thing. Fold over one side of the dough into the middle like a letter . Cover with parchment again and press back into a rectangle. Repeat this with all four sides, folding in and rolling out-you don’t need to roll out a lot just enough to make the whole thing look like a rectangle again. By the last fold your dough will come together and look like something you can work with. Then roll it out to 1/4 inch thickness. For more help with the crust, check out the pictures at The Purple Spoon.

If you plan to brown your crust in the oven, preheat it now to 350°.

Chicken Pot Pie
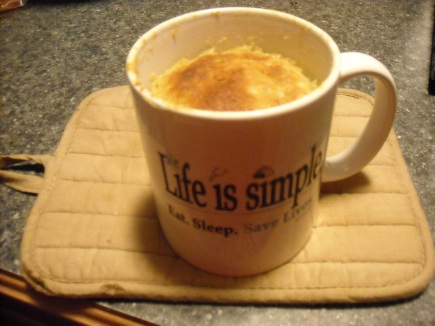
Use your container (I used a ramekin) to cut out a circle for the bottom and top. Place the bottom in the ramekin, then use the remaining pieces to fill in the sides. It doesn’t have to be perfect, just make sure it’s all covered. Prick the bottom and sides with a fork. Pour in the filling and cover with top crust. Pinch together the edges with a fork, and use a knife to cut several vent holes.

Microwave on high for 4-6 minutes until the top crust is dry to the touch. Place your pie in the oven and bake for 5-7 minutes, until the crust turns a light golden brown.

Allow to cool for 5 minutes and enjoy!

Method adapted from Fruit Pies made in the Microwave by Simply Simple Stamping.
Pie crust adapted from Perfect Pie Crust by The Purple Spoon.
White Sauce adapted from Microwave Basic White Sauce by JupiterLady63.

Microwave Pear Crisp in a Mug

Fresh, ripe, juicy pears are one of my favorite foods. To eat such a pear any way but fresh with the juice running down my chin and through my fingers is almost sacrilegious. However, I came across this wonderful recipe for pear crisp in a mug and decided it was worth sacrificing one juicy pear to try it.

Making Pear Crisp

Ingredients:
1 pear, sliced thin
1/2 tsp cinnamon, divided
2 tsp brown sugar, divided
1 Tbsp oat flour
2 Tbsp rolled oats
1/2 tsp butter, melted (for dairy free, substitute canola or coconut oil)

In a small bowl, toss together pear slices, 1/4 teaspoon cinnamon, and 1/2 teaspoon brown sugar; pour into a microwave-safe ramekin or large coffee mug.

In a separate bowl, mix together the oat flour, oats, oil, and remaining brown sugar and cinnamon. Pour this over the pear slices.

Microwave on HIGH for 1 to 1:30 minutes.

Adapted from Microwave Pear Crisp by Act like a Woman, Eat like a Man.

Easy Microwave Lemon Curd

My Beautiful Mother! (She would probably kill me if she knew I posted a picture of her on the internet, but I've always thought she was one of the most beautiful women I know.)

My Beautiful Mother! (She would probably kill me if she knew I posted a picture of her on the internet, but I’ve always thought she was one of the most beautiful women I know.)

In (slightly early) honor of Mother’s Day, this recipe is dedicated to my mom.

My mother is a wonderful woman, and I have her to thank for my cooking acumen. Growing up, I spent almost as much time sitting on the kitchen counter or perched on a chair helping her cook as I did playing outside with my friends. Despite the fact that we’re both getting older, I still see her as she was when I was small, happily teaching me everything there was to know about cooking and baking. I still call her with questions like how to cook her meatloaf; she keeps telling me that I should write down the instructions, but I like calling her to ask.

My mother made Lemon Meringue Pie every single summer. I remember cracking the eggs, learning how to separate them, stirring in the lemon juice and licking the thick curd off of the wooden spoon; I remember watching her whip the meringue, and using the spatula to form pretty peaks. Unlike most lemon meringue pies, hers had a mildly tangy lemon filling with a lightly sweetened meringue. Her pie tasted like summer. Sadly, her recipe was lost and I’ve never found another like it.

Microwave Lemon Curd

If I could choose one item that encompasses every good memory I have of my mother, this would be it. I found this recipe for Microwave Lemon Curd a few days ago, but I had to wait until I had a free moment to make it; tonight was the night. I’ve never tasted lemon curd before, but everything I’ve read about it suggests it tastes like Heaven in a jar. The moment I licked the spoon, I was transported back to those childhood summers, learning to cook and idolizing the woman who magically turned eggs, lemon, and sugar into one of my favorite treats. This curd isn’t quite as thick as Mom’s lemon filling, but the flavor is absolutely perfect. It might not be Heaven, but it’s close.

Mom, this one’s for you!

Ingredients:
3 eggs
1 cup white sugar
1 cup fresh lemon juice (about 4-5 lemons)
zest of 2 lemons
1/2 cup unsalted butter, melted

In a large microwave-safe bowl, lightly beat the eggs. Add the sugar and whisk together until smooth and thoroughly combined. Whisk in lemon juice, lemon zest and butter.

Cook in the microwave on full power for 3-5 minutes, stirring after each minute. The amount of time will vary based on the strength of your microwave**. You will know the lemon curd is done cooking when it coats the back of a metal spoon.

Remove from the microwave, push through a fine, mesh sieve and pour into sterile jar.

Notes: **Mine took 5 minutes in an 1100 watt microwave.
This recipe makes just under 3 cups.
Store lemon curd in the refrigerator for up to 2 weeks.

Adapted from Microwave Lemon Curd by My Baking Addiction.

Pina Colada Muffin in a Mug

I’m feeling a little bit sorry for my regular 12 cup muffin tin. It doesn’t get much use these days and I can’t help but picture it sitting forlornly in the drawer beneath the stove, sighing and lamenting its neglect. Someday soon, I’m going to have to pull it out and make a big batch of muffin or cupcake shaped somethings to give away, but today is not that day. Today, I have some left over shredded coconut sitting in the pantry and a new can of crushed pineapple just begging for a chance to shine.

I’m using this recipe as motivation. (I have the ingredients figured out, and I have enough faith in my microwave muffin instincts now that I’m sure it will work out.) I need to start exercising more, especially since the weather is warming up and I no longer need to make the drive to the gym to keep from turning into an icicle. (Oh how I love Maine winters!) I have all of the necessary workout gear, but I usually lack the motivation to get up and go.

Boyfriend has been talking about starting a couch to 5k, although he’s pretty fit so he’s not really starting at couch, and he’s been hinting that I should too. So, today marks the start of my couch to 5k. As soon as I get back, I’ll put one of these luscious muffins into the microwave! I’m not quite sure that rewarding myself with baked goods is the best way to go about this, but a muffin in a mug is certainly a better option than a whole pan of brownies, right?

Speaking of a whole pan of brownies, I have a wonderful recipe for homemade brownies that almost perfectly replicates my favorite boxed mix, (Betty Crocker Ultimate Fudge Brownies). I’ll post that one this afternoon!

**After a two-mile walk, I came home to my pina colada muffin. It tasted just as amazing as I expected, although it had a slightly more custard-like texture, so I felt like I was eating dessert! All I needed was a bit of fresh whipped cream. I hope you enjoy it too! (Sadly, I just couldn’t seem to get a good picture.)

Ingredients:

2.5 Tbsp milk
1/4 tsp vinegar
1/2 egg, lightly beaten
2 tsp melted butter
4-5 drops vanilla extract
4 Tbsp flour
Pinch salt
1/4 tsp baking powder
2 Tbsp sugar
1 Tbsp + 1 tsp shredded coconut
2 Tbsp + 2 tsp crushed pineapple (drain if using canned)

In a mug, add the milk and vinegar together, and allow to stand 5 minutes. Add the egg, melted butter, and vanilla, and stir to combine. Add the dry ingredients and stir until moistened. Stir in the pineapple.

Microwave on high for up to 3 minutes, checking after 90 seconds. (Mine took exactly 2 minutes.)

Adapted from Pina Colada Muffins by Kitchen Confidante.

Blueberry Muffin in a Mug

I’m beginning to wonder how I survived my childhood, eating cold cereal or microwave oatmeal on most school mornings. Growing up, we occasionally made blueberry muffins on weekends from a boxed mix that came with a small tin of “real Maine blueberries.” These days, I live in Maine and I can get fresh blueberries close to home during the summer.

Homemade blueberry muffins are by far my favorite kind, but I’m the only real muffin lover in the house. It’s not worth making a whole pan of muffins when I’m the only one who will eat them, so I rarely get to have any.

This recipe was requested by another friend of mine, although I was planning on getting around to it soon anyways. A few months ago, I tried my hand at canning blueberries. With four pints sitting in the cabinet, I was looking for ways to start using them up. Once again, mug cooking seemed like a great option. I don’t know why it took me so long to think of trying this!

WARNING: Give this a minute or two to cool when it’s finished. The miracle of microwave cooking makes the blueberries hot enough to incinerate your tongue. No…I don’t know that from experience…really.

Blueberry Muffin in a Mug

Ingredients:
1 Tbsp + 1 tsp butter, softened
2 Tbsp + 2 tsp sugar
1/2 eggs, beaten
2 Tbsp milk
1/3 Cup all-purpose flour
Slightly heaping 1/4 tsp baking powder
Pinch salt
Dash cinnamon
Smidgen nutmeg
1/3 Cup blueberries

In a mug, cream the butter and sugar. Add the egg and stir;
add the milk and stir again. Add the dry ingredients and stir
until thoroughly mixed. Gently fold in the blueberries.

Microwave on high for up to 3 minutes, checking after 90 seconds.
(In an 1100 watt microwave, my muffin cooked in 2 minutes and 15 seconds.)

Cornbread in a Mug

Saturday, I took a batch of bite-sized brownies to my Advanced EMT class. A few of us started talking about recipes, and I mentioned my new obsession with mug cooking. One student, Kevin, asked if I would make cornbread my next mug project. Well, in honor of Kevin, here it is!

Cornbread for Kevin

Cornbread for Kevin

I’ve had jars of cornbread mix sitting in the pantry for a while. Instead of mixing up a whole bunch of ingredients, it made sense to try and use a portion of the mix I already had. For most of these mug recipes, I aim for what would amount to two muffins worth when fully cooked.

For this one, I used 1/3 Cup of cornbread mix, 1/2 an egg (lightly beaten), and a scant 1/4 Cup of milk with just enough vinegar to make 1/4 Cup. It’s light, spongey, and perfect! From now on when I make chili, I won’t bother with a whole pan of cornbread. I’ll just pop two mugs into the microwave for Boyfriend and I!

The recipe for the mix is below. I find it handy because I can just scoop out what I need. If you’d like to mix up just enough for a single serving, please see the adjustments at the bottom.

Edited to add: Boyfriend does not like cornbread, but he finally tried this and gave it 5 FORKS! This is the first time he’s ever given all 5 forks, so that says a lot!

Ingredients for Northern Cornbread Mix:
1 Cup yellow cornmeal
1 Cup unbleached all-purpose flour
2 tsp baking powder
1/2 tsp baking soda
4 tsp sugar
1/2 tsp salt

Whisk together all of the ingredients and store in a pint canning jar or other air-tight container.

Scant 1/4 Cup milk
Enough vinegar to make 1/4 Cup (I prefer cider vinegar, but distilled white works as well)
1/2 egg, lightly beaten
1/3 Cup cornbread mix

In the mug, combine the milk and vinegar, stir gently, and allow to sit for 5 minutes. Add the egg and cornbread mix, stir to combine. Microwave on high for up to 3 minutes; my microwave is 1100 watts and the cornbread was fully cooked in 90 seconds.

To make a single serving, add the following in place of 1/3 Cup of cornbread mix:
2 Tbsp + 2 tsp yellow cornmeal
2 Tbsp +2 tsp all-purpose flour
Slightly heaping 1/4 tsp baking powder
Pinch baking soda
3/4 tsp sugar
Pinch salt

To make a whole pan of cornbread:
1 jar cornbread mix (see recipe above)
2 large eggs
2/3 Cup buttermilk
2/3 Cup milk
2 Tbsp unsalted butter, melted

Pour one jar of mix into a large mixing bowl and make a well in the middle. Crack the eggs into the well and stir lightly with a wooden spoon, then add the buttermilk and milk. Stir the wet and dry ingredients quickly until almost combined. Add the melted butter and stir until the ingredients are just combined.

Pour the batter into the greased pan. Bake until the top of the cornbread is golden brown and lightly cracked and the edges have pulled away from the sides of the pan, about 25 minutes.

Transfer the pan to a wire rack and cool slightly, 5 to10 minutes. Cut the cornbread into squares and serve warm. Pan can be wrapped in foil and stored a room temperature for up to 1 day. Reheat cornbread in a 350°F oven for 10 to 15 minutes.

The inspiration for this recipe came from Golden Northern Cornbread by Kelly Rossiter.

Spiced Applesauce Cake in a Mug

Applesauce Cake with Butter

Can you tell that I’m obsessed with mug recipes? This past week, I’ve been working feverishly to put up a show. I choreographed a long dance piece that opened yesterday, so I haven’t had much time to grocery shop, cook, do dishes, or just about anything else unrelated to dancing. With few clean dishes, a nearly empty pantry, and very little time, I’ve had to get creative when I get hungry.

I find mug cooking for breakfast to be perfect. It only takes me a couple of minutes to put together, tastes great, and is additive free. Two days ago, I made banana bread in a mug. Unfortunately, that was my last banana. One of the few ingredients that I have lying around at the moment is applesauce. I figured it wouldn’t be too difficult to make applesauce cake in a mug. It was delicious! I hope you enjoy it too.

This recipe is amazing for breakfast or a snack with a bit of butter. It would also make a wonderful dessert with a bit of drizzled cream cheese icing or topped with vanilla ice cream with caramel sauce.

Ingredients:
1/4 Cup applesauce
1/2 Egg, lightly beaten (or 1 egg yolk)
Dash Vanilla extract
4 Tbsp All-purpose flour
2 Tbsp + 2 tsp Sugar
1/4 tsp Baking soda
Pinch Salt
Dash cinnamon
Dash Ginger
Dash Cloves

Batter

Add all of the ingredients to a mug and stir to combine. Microwave on high for up to 3 minutes, checking after 90 seconds; a toothpick inserted into the center should come out clean. This cake rises quite a bit, so keep an eye on it; if it looks about to pour over the sides, pause the cooking until it settles.

Applecause Cake

Minute Brownie in a Mug

I absolutely love brownies. I can’t stand having a whole pan of them sitting around the house. This is the perfect solution! Boyfriend only gives this one 4 forks because it’s so rich.

Brownie with Whipped Cream

This recipe is amazing. I microwaved it for 65 seconds in an 1100 watt microwave and it came out with a fudgey molten center. 75-80 seconds would result in a firmer brownie. Be careful not to overcook it. (Since it has no eggs it only needs to get warm enough to taste good.)

Ingredients:
2 Tbsp butter, melted
2 Tbsp warm water
1/4 tsp vanilla extract
1 dash salt
4 Tbsp granulated sugar
2 Tbsp unsweetened cocoa powder
4 Tbsp all-purpose flour

Directions:

In a 12 oz coffee mug, melt the butter; add the water, vanilla, and salt. Mix well. Add cocoa powder, sugar, and flour; mixing well after each addition.

Microwave for 60 to 90 seconds. The center should be slightly molten; be careful not to overcook it.

Enjoy it with a bit of fresh whipped cream. Be careful; as with most microwave magic, the center will be hot enough burn a hole through your tongue.

NOTES:
I served mine with homemade whipped cream (put up to a 1/4 C heavy cream and a small amount of sugar to taste in a blender and blend until stiff) and some homemade hot fudge. If your microwave is a lower wattage, you’ll probably have to cook it a bit longer to get a fully cooked brownie.

Inspired by this recipe by Wheres_the_beef?

Banana Bread in a Mug

I am obsessed with cooking things in mugs. Boyfriend works nights, so I usually only cook one big meal for him, and then I eat the leftovers for dinner the next day. The rest of the time I’m on my own and I hate making a lot of food when I’m only hungry for something small. Microwave mug cooking has been the perfect solution.

Up until now, I’ve been working exclusively from other people’s established recipes. I had half of a banana left over from a PB&Banana sandwich the other day, so I decided to make banana bread in a mug to use it up. Unfortunately, all of the recipes I found called for a whole egg and a whole banana for just one little mug. In my regular recipe, one egg and three bananas makes a whole loaf pan, so it seemed a little bit out of proportion.

I’m still a little leery when it comes to baking and I like to stick to recipes exactly as they’re written, but I wasn’t happy with anything I found. It seemed my only choice was to depart from the script and try to create my own. The result was absolutely perfect.

In a mug, mash the banana with a fork.

With a fork, mash your banana in the mug.


Add the egg, oil, and extract and stir. Add in the flour, sugar, baking soda, and salt. Stir until fully combined.

Add in the flour, sugar, baking soda, and salt. Stir until fully combined.


Microwave for up to 3 minutes, checking after 90 seconds. Mine was on the verge of overflowing, so I paused it at 45 seconds to let it settle before finishing the cooking. (Mine took 90 seconds total.)

Microwave for up to 3 minutes, checking after 90 seconds. Mine was on the verge of overflowing, so I paused it at 45 seconds to let it settle before finishing the cooking. (Mine took 90 seconds total.)


If you prefer your bread slightly brown like it's fresh out of the oven (I do!), place it under the broiler with the oven door slightly open. Cook just until the top is a golden brown. Do not walk away, because it can turn from golden to charred.

If you prefer your bread slightly brown like it’s fresh out of the oven (I do!), place it under the broiler with the oven door slightly open. Cook just until the top is a golden brown. Do not walk away, because it can quickly turn from golden to charred.


Serve warm with a little bit of butter.

Serve warm with a little butter.


Ingredients:
1/2 Banana
1/2 Egg, lightly beaten (or 1 egg yolk)
Scant Tbsp Vegetable oil
Dash Vanilla extract
4 Tbsp All-purpose flour
2 Tbsp + 2 tsp Sugar
Scant 1/4 tsp Baking soda
Pinch Salt

In a mug, mash the banana with a fork. Add the egg, oil, and extract and stir. Add the flour, sugar, baking soda, and salt. Stir until fully combined. Microwave for up to 3 minutes, checking after 90 seconds. Mine was on the verge of overflowing, so I paused it at 45 seconds to let it settle before finishing the cooking. (Mine took 90 seconds total.)

If you prefer your bread slightly brown like it’s fresh out of the oven (I do!), place it under the broiler with the oven door slightly ajar. Cook just until the top is a golden brown. Do not walk away, because it can quickly turn from golden to charred.

Serve warm with a little bit of butter.