Honey Oat Bread (Gluten-free)

SlicedLoaf
Bread and I have an interesting history. I began my life eating white bread, as did most children in the 80s. I was never one for the limp, dry crust, so my mother kindly removed it by cutting my sandwiches into circles and other creative shapes using cookie cutters. I was popular at lunch time! As the anti-white bread movement picked up steam in the 90s, my mother decided to switch us to potato and whole wheat breads. By whole wheat, I don’t mean the beautiful quality grainy breads that are available today. I’m talking about the bread that was little more than caramel colored white bread.

Eventually, I found my way to the beautiful whole grain breads with tangible bits of grain. Twelve-grain and honey oat breads became staples in my home. I had finally fallen in love with bread. I had my first experience with homemade bread when I was sick and a lovely older lady from my church brought over a freshly baked loaf and some chicken soup for me. WOW! If I had been in love with bread before, I was now over the moon. Sadly, the love affair ended when I became intolerant to wheat about two years ago.

Then, something amazing happened. I met a young woman with a ton of food allergies herself, including many of my own (wheat and corn among them) and she suggested a wheat and corn-free oat bread that she buys from a local health food store. While that sounded appealing (and a personal endorsement of a gluten-free product is important to me), I knew there had to be a way to make it myself. I found this recipe for Gluten-free Honey Oat Bread and it has been a minor miracle. It’s hearty, perfectly textured, wheat and corn-free, delicious, and amazingly easy! Even better, most of the ingredients are things I keep around the house anyways. Hopefully you’ll enjoy it as much as I did!

Ingredients
2 scant Tbsp yeast
1 1/2 Cups Warm water
1/4 Cup Olive oil
1/4 Cup + 2 Tbsp Honey (Agave may be substituted, see below**)
3 1/3 Cups Oat flour* (10.6 oz)
1/2 Cup Rice flour* (2.8 oz)
1/2 Cup Corn starch (or tapioca flour)
2 tsp Xanthan gum (for a xanthan gum replacement, I like this)
1 tsp Salt
4 Eggs, warmed to room temperature

Preheat the oven to 200° F. Line a 10 inch loaf pan with parchment paper and spray well with cooking spray.

Combine the yeast and water (105-115° F) and allow to sit for several minutes until the surface begins to foam. Add the oil, honey (or agave), flours, starch, and xanthan gum (or alternative) and beat until combined (do not use bread hooks). Add the salt and eggs. Beat for a few minutes minutes more until dough appears fluffy. Pour into the parchment lined loaf pan.

RisenDoughCover the loaf pan with a damp cloth. Turn the oven off, and place both the loaf pan and a shallow pan containing a small amount of water into the warmed oven. Allow the dough to rise for 20 to 30 minutes until doubled, checking after 20 minutes.

SlicedBread
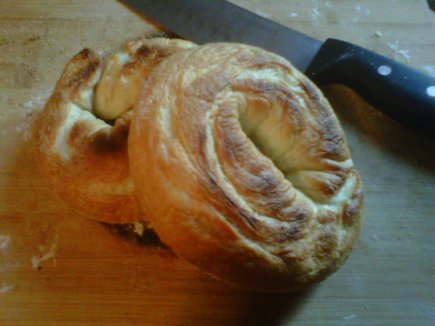
When the dough has risen, remove it from the oven and increase the temperature to 350° F. Sprinkle the top of the risen loaf with some more oats and cut a few slits in the top with a serrated knife. Bake for about 45 minutes. Removed the bread from the pan immediately and place on a wire rack. Allow to cool before cutting.
 
 
*You can make your own oat or rice flour by grinding dried oats or rice in a blender or food processor until they become a fine powder. When grinding my own, I found that the oat flour felt like a very fine powder and the rice flour retained a slightly gritty texture.

**If using agave nectar, reduce the temperature by 25° F and increase the baking time. The bread is done when the internal temperature reaches 200° F.

Homemade Bagels

Homemade Bagels
Ingredients
1 1/2 tsp Sugar, divided
1 tsps Active dry yeast
1/2 Cup + 2 to 4 Tbsp Warm water, divided3/4 tsp Salt
2 Cups Bread flour (9.6 oz Gold Medal Better Than Bread Flour)
3/4 tsp Salt
1/2 Tbsp Vegetable oil

Combine 1/4 Cup of warm water (105°-110°F), 1/2 tsp sugar, and the yeast in a liquid measuring cup. Allow the mixture to sit for several minutes until the surface begins to foam. (Some would say that this step isn’t necessary if you’re using instant yeast, but I find that it can’t hurt and only takes a few extra seconds. I’d rather do this than get to the end and realize my yeast was bad when the dough doesn’t rise.)

While waiting for the yeast to proof, combine the flour, remaining sugar, salt, and vegetable oil. Add the yeast mixture, plus 1/4 Cup and two tablespoons of the warm water. The dough should feel stiff, but add the extra 2 tablespoons of water if the dough is really stiff or you can’t get all the dry flour incorporated.

Turn the dough down onto a lightly floured surface and knead for about ten minutes or until the dough is uniform and smooth.

Cut the dough into 4 equal sized balls, and let rest for 10-20 minutes. Yeast dough is happiest between 70 and 80 degrees. If your kitchen is too cool, turn on the oven for just 1-2 minutes and then let the dough rise in there. Do not forget to turn the oven back off before proofing your dough.

Preheat your oven to 425°F.

Take each dough ball and use two hands to roll it into a snake slightly longer than the width of both hands. When the snake is the proper length, wrap it around your dominant hand so the overlapping ends are together at your palm near the base of your fingers. Use your palm to squish the overlapping ends together. Once the dough is fused, slip it off of your hand and you should have a perfectly circular ring of dough. Try not to get discouraged if they aren’t shaped quite perfectly. It takes a bit of practice.

Let your bagels rest on the counter for about 20 minutes. Meanwhile, bring a pot of water to boil and grease a large baking tray lightly with vegetable oil.

After 20 minutes, your bagels should start to look puffy. Add as many as you can to your boiling water without crowding. Boil you bagels for about a minute on each side. Remove them from the water, allowing them to dry briefly, and place them on your oiled baking tray. Repeat until all the bagels are boiled.

Place the tray in the oven. Bake the bagels for 20 minutes, turning them over halfway through the cooking time.

Let them cool for at least 20 minutes before serving.

To create flavored bagels like sesame seed or onion, spread the seed or slice on a small dry plate. Place the boiled, dried bagels face down onto the plate to coat and then place them seed side up on the baking tray. Bake and flip as described above.

Adapted slightly from Homemade Bagel Recipe by John D Lee.

Zucchini Bread (Grain, oil, and dairy free)

Zucchini Muffins
I grew up in the era of processed food, in a time when scientists and nutrition gurus told us that margarine and Snackwells cookies were healthy and that whole foods like beef and eggs were not. Much of my mother’s baking came from a boxed mix, but one thing that she always made from scratch was zucchini bread. I could eat that stuff for breakfast, lunch, and dinner. I enjoy other quick breads, but zucchini bread has always been my favorite. I suppose it reminds me of sitting on the counter, wooden spoon in hand, learning how to bake with my mother.

On Sunday, a coworker gave me two beautiful zucchini squash and my first thought was about zucchini bread. I may not be able to have wheat, but I can still have my zucchini bread. This time, I made muffins because I wanted something easy and portable.

Ingredients
Cooking spray
2 Cups Cooked chickpeas
2 Eggs
1/2 tsp Salt
1/2 tsp Baking soda
1/2 tsp Baking powder
1 tsp Cinnamon
1/2 tsp Nutmeg
1 Tbsp Unsweetened applesauce or full-fat yogurt
3/4 Cup Sugar
1 Cup Grated zucchini

Preheat oven to 350°F. Spray a muffin tin with cooking spray or line with cupcake papers and set aside.

In a food processor, process chickpeas and eggs until smooth. Add remaining ingredients except for zucchini and continue to process until fully blended. Fold in zucchini and pour into prepared muffin tin.

Bake until the muffins are a deep golden brown and a toothpick inserted in the middle comes out clean, about 40 minutes.
Cool in the tin on a cooling rack for 30 minutes, then remove from the pan and continue cooling on rack.

Cornbread in a Mug

Saturday, I took a batch of bite-sized brownies to my Advanced EMT class. A few of us started talking about recipes, and I mentioned my new obsession with mug cooking. One student, Kevin, asked if I would make cornbread my next mug project. Well, in honor of Kevin, here it is!

Cornbread for Kevin

Cornbread for Kevin

I’ve had jars of cornbread mix sitting in the pantry for a while. Instead of mixing up a whole bunch of ingredients, it made sense to try and use a portion of the mix I already had. For most of these mug recipes, I aim for what would amount to two muffins worth when fully cooked.

For this one, I used 1/3 Cup of cornbread mix, 1/2 an egg (lightly beaten), and a scant 1/4 Cup of milk with just enough vinegar to make 1/4 Cup. It’s light, spongey, and perfect! From now on when I make chili, I won’t bother with a whole pan of cornbread. I’ll just pop two mugs into the microwave for Boyfriend and I!

The recipe for the mix is below. I find it handy because I can just scoop out what I need. If you’d like to mix up just enough for a single serving, please see the adjustments at the bottom.

Edited to add: Boyfriend does not like cornbread, but he finally tried this and gave it 5 FORKS! This is the first time he’s ever given all 5 forks, so that says a lot!

Ingredients for Northern Cornbread Mix:
1 Cup yellow cornmeal
1 Cup unbleached all-purpose flour
2 tsp baking powder
1/2 tsp baking soda
4 tsp sugar
1/2 tsp salt

Whisk together all of the ingredients and store in a pint canning jar or other air-tight container.

Scant 1/4 Cup milk
Enough vinegar to make 1/4 Cup (I prefer cider vinegar, but distilled white works as well)
1/2 egg, lightly beaten
1/3 Cup cornbread mix

In the mug, combine the milk and vinegar, stir gently, and allow to sit for 5 minutes. Add the egg and cornbread mix, stir to combine. Microwave on high for up to 3 minutes; my microwave is 1100 watts and the cornbread was fully cooked in 90 seconds.

To make a single serving, add the following in place of 1/3 Cup of cornbread mix:
2 Tbsp + 2 tsp yellow cornmeal
2 Tbsp +2 tsp all-purpose flour
Slightly heaping 1/4 tsp baking powder
Pinch baking soda
3/4 tsp sugar
Pinch salt

To make a whole pan of cornbread:
1 jar cornbread mix (see recipe above)
2 large eggs
2/3 Cup buttermilk
2/3 Cup milk
2 Tbsp unsalted butter, melted

Pour one jar of mix into a large mixing bowl and make a well in the middle. Crack the eggs into the well and stir lightly with a wooden spoon, then add the buttermilk and milk. Stir the wet and dry ingredients quickly until almost combined. Add the melted butter and stir until the ingredients are just combined.

Pour the batter into the greased pan. Bake until the top of the cornbread is golden brown and lightly cracked and the edges have pulled away from the sides of the pan, about 25 minutes.

Transfer the pan to a wire rack and cool slightly, 5 to10 minutes. Cut the cornbread into squares and serve warm. Pan can be wrapped in foil and stored a room temperature for up to 1 day. Reheat cornbread in a 350°F oven for 10 to 15 minutes.

The inspiration for this recipe came from Golden Northern Cornbread by Kelly Rossiter.