Lemon Blueberry Oatmeal

Steel cut oatmeal with blueberries and lemon curdI’m jumping back on the healthy eating bandwagon. One of my co-workers last week suggested we all do a sort of Biggest Loser competition/joint venture. We finally settled on individually keeping track of our fitness (at least 20 minutes of daily activity), our eating (by tracking calories), and our personal goal (measured by weight or inches) for the next 12 weeks. The contest starts tomorrow, and I’m working this weekend to find recipes and easy meal ideas so I can stay on track.

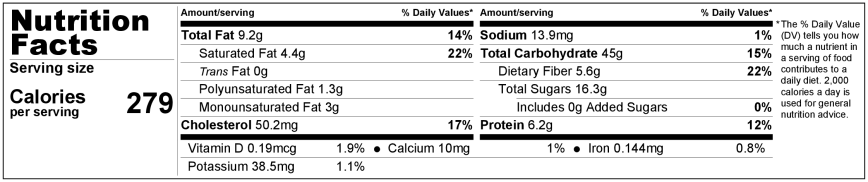
This particular recipe contains lemon curd, far from the healthiest of foods, but it actually comes with a lower calorie count than some of its counterparts (Orange Cranberry Oatmeal and Spiced Apple Oatmeal…recipes coming soon)  despite the added sugar and fat. The key here is portions.

I made Microwave Lemon Curd (recipe at the bottom) because I still haven’t gotten around to buying myself a double boiler and the recipe doesn’t require separating the eggs, which means less work and less waste; somehow I never get around to actually using the leftover egg whites.

Ingredients

1 1/4-1 1/2 C water

1/4 C steel cut oats**

2 Tbsp prepared lemon curd

1/4 C fresh or frozen blueberries (thawed)

1 tsp lemon zest, optional


Heat water in small saucepan to boiling, add oatmeal and stir. Reduce heat to low and simmer  uncovered for 20 minutes or until most of the water has been absorbed. Remove from heat and allow to stand for 2 to 3 minutes. Oatmeal will continue to thicken as it cools.

Combine oatmeal with lemon curd and blueberries. Top with lemon zest, and serve warm.

**I love steel cut oats, but if you don’t you can make it with any plain oatmeal. Substitute one serving of your favorite prepared oatmeal for the water and steel cut oats.

NutritionLabel

Microwave Lemon Curd

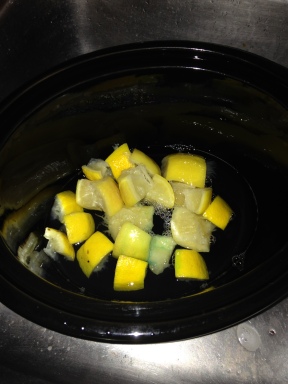
1/2 C butter, melted

1 C fresh lemon juice

3 large eggs

1 C granulated sugar

Zest of 1-3 lemons


Whisk together all ingredients in a large, microwave-safe bowl (7-8 cup size will prevent bubbling over). Microwave in 1 minute increments, stirring after each minute. Lemon curd is done when it coats the back of a spoon and mounds gently in the center of the bowl when stirring; this generally takes 4-10 minutes depending on the strength of your microwave.

Recipe makes approximately 2 cups. Lemon curd can be stored in the refrigerator for 3-4 weeks or frozen for up to a year. If thawing from frozen, allow lemon curd to sit in the refrigerator at 40 degrees for 24 hours prior to using. Thawed curd will keep in the refrigerator for up to 4 weeks.

How to Remove Strong Scents from Dishes and Tupperware

I sometimes find myself with dishes (usually plastic storage containers, but not always) that smell like the food they last contained, even after washing. Even worse, I occasionally have one that smells like mold after it takes a trip to Narnia…aka the back of the refrigerator.

I know that plastic storage containers are largely meant to be tossed out eventually, but I hate doing that unless I absolutely have no other choice. For one, it’s bad for the environment, and for two, I’m thrifty. I accidentally came upon this solution shortly after a nasty cold.

During cold and flu season, my household goes through a lot of lemons making Hot Lemonade. It’s our go-to drink for sore throats and horse voices. The drink uses a whole lemon cut up into eight pieces. The used lemons don’t have enough flavor to be used again in a drink, but they still have plenty of useful life. Once we’re done drinking our Hot Lemonade, the left over lemons go into a container in the refrigerator. They last that way for a few weeks.

Lemon Scent

To remove the scent from your dishes, place one or more lemon pieces into the smelly dish. Add a small amount of dish soap (I prefer Dawn), and fill with very hot water. Allow to soak until the water returns to room temperature.

My crock pot is currently undergoing this treatment to remove the scent of burnt chicken and pineapple.

Farm Fresh: Spicy Celery Root Soup

Image courtesy of Blake Royer

Image courtesy of Blake Royer

With no less than 8 ugly celery roots residing in my refrigerator, I needed a recipe. With the cool autumn weather settling in, this warm and hearty soup caught my eye. The chile adds a pleasing warmth for cool, damp days.

Ingredients
1 Medium onion, finely chopped
1 Red chile, finely chopped and seeds removed (leave some or all of the seeds for a spicier soup)
2 -3 cloves Garlic, finely chopped
2 tbsp Olive oil
1 tsp Cumin
1 tsp Ground coriander
1 1/2 lbs Celeriac, peeled,trimmed and cut into cubes
3 Cups Chicken broth
1 Cup Water
Salt & freshly ground black pepper (I use 1 tsp salt and 1/2-3/4 tsp pepper)
1/3 Cup Light cream
Fresh coriander or parsley for garnish, chopped

In a large pot, sauté the onion, chili and garlic in olive oil for 2-3 minutes over a medium heat. Stir in the cumin and coriander, and season with salt and pepper. Add the celeriac, chicken broth and water.

Bring up to a boil, then reduce the heat, cover the pan and let simmer for 10-15 minutes or just until the celeriac is cooked.

Remove from the heat and use a handblender or food processor to puree the soup until smooth. Stir in the cream, adjust the seasoning with more salt and pepper if needed,and ladle into bowls. Top with a few chopped coriander or parsley leaves if desired, and serve immediately.

Alternately, allow the soup to cool, pour into pint sized wide-mouth jars or other freezer safe containers and freeze.

Adapted from Creamy Curried Celery Root Soup and Celeriac Soup with Coriander and Chiles.

Farm Fresh: Hearty Butternut Squash Soup

Photo courtesy of Taste of Home

Photo courtesy of Taste of Home

I’m quite a bit behind on my “Farm Fresh” posts for the year. Luckily, the early fall produce we received in our CSA shares at the end of the season will be available for a few more months.

I’ve never had much of an interest in squash. With the exception of a newly discovered affinity for acorn squash filled with butter and brown sugar, I still don’t enjoy it much. Receiving two large butternut squash in our CSA share felt like the universe challenging me to really give it a chance. My mother taught me to try at least one bite of everything put in front of me, and I’ve learned through experience that tastes change and it’s possible to find at least one method to make almost any food edible (and sometimes even enjoyable). Apparently, butternut squash was made for soup! This one is smooth, creamy, rich, slightly spicy, and extremely flavorful. It is one of my favorite soups. I made one batch to try, and a second days later to freeze. We finished up the last of it a few days ago and I’m making yet another batch for the freezer. This soup has become a staple in my house!

Ingredients
1 pound Italian sausage
1 medium Onion, chopped
1 medium Red bell pepper, chopped
4 Garlic cloves, minced
1 large Butternut squash (about 5 pounds), peeled, seeded and cut into 1-inch cubes
1 package (16 ounces) Frozen cauliflower
4 cups Chicken broth
1 cup cooked great northern beans, rinsed and drained
1 cup cooked garbanzo beans, rinsed and drained
2 cans (14-1/2 ounces each) fire-roasted diced tomatoes, undrained
1/2 cup frozen corn (optional)
1 teaspoon salt
1/4 teaspoon pepper
Light cream and minced fresh parsley (optional)

In a large pot, cook the sausage, onion and red pepper over medium heat 9-11 minutes or until the sausage is no longer pink and the onion is tender, breaking the sausage into crumbles. Add the garlic and cook 1 minute longer. Remove with a slotted spoon; discard drippings.

Add the squash, cauliflower, and chicken broth to the same pan and bring to a boil. Reduce heat; simmer, covered, 15-20 minutes or until squash is tender.

Remove from heat and cool slightly. Process in batches in a blender until smooth. Return the mixture to the pot. Add beans, tomatoes, salt, pepper, sausage mixture and corn (if desired); heat through. If desired, drizzle servings with cream and sprinkle with parsley. Yield: 12 servings (4-1/2 quarts).

Freeze option: Freeze cooled soup in wide-mouth quart-sized jars. To use, partially thaw the soup in the refrigerator overnight. Heat through in a saucepan, stirring occasionally and adding a little water if necessary.

Adapted from Hearty Butternut Squash Soup in Taste of Home September/October 2013, p3-6.

Honey Oat Bread (Gluten-free)

SlicedLoaf
Bread and I have an interesting history. I began my life eating white bread, as did most children in the 80s. I was never one for the limp, dry crust, so my mother kindly removed it by cutting my sandwiches into circles and other creative shapes using cookie cutters. I was popular at lunch time! As the anti-white bread movement picked up steam in the 90s, my mother decided to switch us to potato and whole wheat breads. By whole wheat, I don’t mean the beautiful quality grainy breads that are available today. I’m talking about the bread that was little more than caramel colored white bread.

Eventually, I found my way to the beautiful whole grain breads with tangible bits of grain. Twelve-grain and honey oat breads became staples in my home. I had finally fallen in love with bread. I had my first experience with homemade bread when I was sick and a lovely older lady from my church brought over a freshly baked loaf and some chicken soup for me. WOW! If I had been in love with bread before, I was now over the moon. Sadly, the love affair ended when I became intolerant to wheat about two years ago.

Then, something amazing happened. I met a young woman with a ton of food allergies herself, including many of my own (wheat and corn among them) and she suggested a wheat and corn-free oat bread that she buys from a local health food store. While that sounded appealing (and a personal endorsement of a gluten-free product is important to me), I knew there had to be a way to make it myself. I found this recipe for Gluten-free Honey Oat Bread and it has been a minor miracle. It’s hearty, perfectly textured, wheat and corn-free, delicious, and amazingly easy! Even better, most of the ingredients are things I keep around the house anyways. Hopefully you’ll enjoy it as much as I did!

Ingredients
2 scant Tbsp yeast
1 1/2 Cups Warm water
1/4 Cup Olive oil
1/4 Cup + 2 Tbsp Honey (Agave may be substituted, see below**)
3 1/3 Cups Oat flour* (10.6 oz)
1/2 Cup Rice flour* (2.8 oz)
1/2 Cup Corn starch (or tapioca flour)
2 tsp Xanthan gum (for a xanthan gum replacement, I like this)
1 tsp Salt
4 Eggs, warmed to room temperature

Preheat the oven to 200° F. Line a 10 inch loaf pan with parchment paper and spray well with cooking spray.

Combine the yeast and water (105-115° F) and allow to sit for several minutes until the surface begins to foam. Add the oil, honey (or agave), flours, starch, and xanthan gum (or alternative) and beat until combined (do not use bread hooks). Add the salt and eggs. Beat for a few minutes minutes more until dough appears fluffy. Pour into the parchment lined loaf pan.

RisenDoughCover the loaf pan with a damp cloth. Turn the oven off, and place both the loaf pan and a shallow pan containing a small amount of water into the warmed oven. Allow the dough to rise for 20 to 30 minutes until doubled, checking after 20 minutes.

SlicedBreadWhen the dough has risen, remove it from the oven and increase the temperature to 350° F. Sprinkle the top of the risen loaf with some more oats and cut a few slits in the top with a serrated knife. Bake for about 45 minutes. Removed the bread from the pan immediately and place on a wire rack. Allow to cool before cutting.
 
 
*You can make your own oat or rice flour by grinding dried oats or rice in a blender or food processor until they become a fine powder. When grinding my own, I found that the oat flour felt like a very fine powder and the rice flour retained a slightly gritty texture.

**If using agave nectar, reduce the temperature by 25° F and increase the baking time. The bread is done when the internal temperature reaches 200° F.

Lemon Ricotta Thumbprint Cookies

Lemon Ricotta Thumbprint Coolies

I’ve been so incredibly busy. I’m still working at the hospital to finish the required clinical time for my Advanced EMT license. I’m also teaching 7 classes per week at the dance studio, building websites, and cooking up a storm. With the shorter days (whose bright idea was it to make it get dark at 4 pm in October???), I seem to be in hibernation mode. However, these bright and fruity cookies were enough to shake me out of the doldrums. They taste like a bite of Spring!

Ingredients
2 Sticks butter, softened
8 oz Ricotta cheese
1 tsp Lemon extract
2 Cups Flour
1/4 Cup Granulated sugar
Jelly or Jam (I used raspberry and apricot, but I believe blueberry would be terrific)

Preheat oven to 375°F.

Beat butter, ricotta and vanilla together until creamy. Mix in flour to form dough. Refrigerate until firm, about 30 minutes.

Form dough into 1/2 tablespoon balls and roll in granulated sugar. Use 1/2 tsp measure to create an indentation in each cookie. Fill each cookie with about 1/4 tsp of jelly or jam.

Bake for 9 to 11 minutes or until cookies are golden on the bottom. Let cool completely.

Adapted from Ricotta Thumbprint Cookies.

Homemade Bagels

Homemade Bagels
Ingredients
1 1/2 tsp Sugar, divided
1 tsps Active dry yeast
1/2 Cup + 2 to 4 Tbsp Warm water, divided3/4 tsp Salt
2 Cups Bread flour (9.6 oz Gold Medal Better Than Bread Flour)
3/4 tsp Salt
1/2 Tbsp Vegetable oil

Combine 1/4 Cup of warm water (105°-110°F), 1/2 tsp sugar, and the yeast in a liquid measuring cup. Allow the mixture to sit for several minutes until the surface begins to foam. (Some would say that this step isn’t necessary if you’re using instant yeast, but I find that it can’t hurt and only takes a few extra seconds. I’d rather do this than get to the end and realize my yeast was bad when the dough doesn’t rise.)

While waiting for the yeast to proof, combine the flour, remaining sugar, salt, and vegetable oil. Add the yeast mixture, plus 1/4 Cup and two tablespoons of the warm water. The dough should feel stiff, but add the extra 2 tablespoons of water if the dough is really stiff or you can’t get all the dry flour incorporated.

Turn the dough down onto a lightly floured surface and knead for about ten minutes or until the dough is uniform and smooth.

Cut the dough into 4 equal sized balls, and let rest for 10-20 minutes. Yeast dough is happiest between 70 and 80 degrees. If your kitchen is too cool, turn on the oven for just 1-2 minutes and then let the dough rise in there. Do not forget to turn the oven back off before proofing your dough.

Preheat your oven to 425°F.

Take each dough ball and use two hands to roll it into a snake slightly longer than the width of both hands. When the snake is the proper length, wrap it around your dominant hand so the overlapping ends are together at your palm near the base of your fingers. Use your palm to squish the overlapping ends together. Once the dough is fused, slip it off of your hand and you should have a perfectly circular ring of dough. Try not to get discouraged if they aren’t shaped quite perfectly. It takes a bit of practice.

Let your bagels rest on the counter for about 20 minutes. Meanwhile, bring a pot of water to boil and grease a large baking tray lightly with vegetable oil.

After 20 minutes, your bagels should start to look puffy. Add as many as you can to your boiling water without crowding. Boil you bagels for about a minute on each side. Remove them from the water, allowing them to dry briefly, and place them on your oiled baking tray. Repeat until all the bagels are boiled.

Place the tray in the oven. Bake the bagels for 20 minutes, turning them over halfway through the cooking time.

Let them cool for at least 20 minutes before serving.

To create flavored bagels like sesame seed or onion, spread the seed or slice on a small dry plate. Place the boiled, dried bagels face down onto the plate to coat and then place them seed side up on the baking tray. Bake and flip as described above.

Adapted slightly from Homemade Bagel Recipe by John D Lee.

Bacon Wrapped Pickles

Bacon Wrapped Pickle
This may seem like an incredibly unlikely post for a blog that attempts some kind of health consciousness. However, I’ve had a rough couple of days and I needed something special. I was talking to a friend about wanting comfort foods including pickles and bacon. Somehow, we ended up joking about bacon wrapped pickles. The joke became an idea and the idea became a reality. The universal “they” does say that bacon makes everything better, right?

Here is the “health conscious part” (Notice how health conscious is in quotes? I’m completely rationalizing this unhealthy behavior, but it’s totally worth it for a bacon wrapped pickle!): Everything is made from scratch!

Ingredients
1 Dill pickle spear (recipe)
1 Slice bacon

Wrap the pickle with the slice of bacon, securing the bacon ends to the ends of the pickle with toothpicks if necessary.

Heat a pan over medium, add the bacon wrapped pickle, and fry on all sides until crispy.

Enjoy your bacon wrapped pickle. You’re welcome.

(P.S. I suspect this will become the next big thing at those southern fairs where fried food reigns. Move over Fried KoolAid; Bacon Wrapped Pickles are here!)

Spicy Garlic Dill Pickles (Refrigetator Method)

Almost Pickles

I’m way behind in my posts, and I feel horrible about it. I’ve been cooking up a storm, but haven’t had much time to assemble it all into useful blogging magic. I have a legitimate excuse, promise. I’ve been working nights in the Emergency Department of the local hospital to complete my Advanced EMT license. Saving lives is worth a little blogging delay, right???

Unfortunately, that means this pickle recipe is just a little bit out of season. A while back our CSA bag included both pickling cucumbers AND fresh dill in the same week! The obvious solution? Dill pickles! I searched far and wide for a decent recipe. I, personally, do not like sweet pickles. I won’t touch them. So many of the recipes I found suggested adding a small amount of sugar to the mix, but I don’t like even a hint of sweetness in my pickles so I was determined to avoid it. This recipe does the trick. When I finally cracked open the first jar, I ate the entire thing in about an hour. These are THAT good!

I strongly prefer to use fresh dill in my pickles, but I turn to dry dill in a pinch. This year, with the exception of the first batch, there was no fresh dill to be found at any of the grocery stores in town. It seems that lots of people around here pickle things and like their fresh dill. I made my second batch with dried dill, but that created its own unexpected problem. Dried dill floats and sticks to the pickles. I finally found the trick with the third batch…tea bags. I created my own little dried dill teabags and put them into the bottom of the jars with the rest of the spices.

Although some people boil their pickles in a water bath canner, I can survive without an apocalyptic supply of pickles so I stick to the refrigerator method. If you’d like to process yours to make them shelf stable, you can find instructions here.

Place your spices in the bottom of each jar.

Place your spices in the bottom of each jar.

Cut cucumbers and place into the jars. They should fit tightly but not be squashed.

Cut cucumbers and place into the jars. They should fit tightly but not be squashed.

After about 2 weeks, enjoy your pickles. The longer they sit, the better they taste!

After about 2 weeks, enjoy your pickles. The longer they sit, the better they taste!

Ingredients
2 pounds pickling cucumbers
1 1/2 cups distilled white vinegar
1 1/2 cups water
2 tablespoons pickling salt
6 garlic cloves, peeled (2 per jar)
3/4 teaspoon crushed red pepper per jar (1/4 teaspoon per jar)
6-12 sprigs fresh dill (2-4 per jar), or 2-3 tsp dried dill per jar
1 1/2 teaspoon black peppercorns per jar (1/2 tsp per jar)

Wash the cucumbers, remove the ends, and cut them into spears no larger than 1 inch shorter than the height of the jar.

In a medium saucepan, combine vinegar, water and salt. Bring to a simmer.

Arrange the jars on the counter and divide the spices between them. Pack the cucumber slices firmly into the jars, but not so tightly that they are bruised or damaged.

Pour the brine into the jar, leaving approximately ½ inch headspace.

Tap the jars gently on a table or counter to dislodge any trapped air bubbles.

Apply the lids and rings, and allow them to return to room temperature. When cool, place them in the refrigerator. Your pickles are ready to eat in about two weeks and will last up to six months in the refrigerator (if you can leave them alone that long

Adapted from Garlic Dill Refrigerator Pickles by Marisa Mcclellan.

Farm Fresh: Tomatillo Curry

Tomatillo Curry

What in the world is a tomatillo? That’s the question I found myself trying to answer this week. Although I’d seen them a few times in the grocery store, I was never interested enough to try one. Then, I found myself saddled with three pounds of them! Roommate has been out of town for nearly three weeks now, so I have double the produce to use up.

At the beginning of the summer, I spent a lot of time looking up canning recipes that I’d like to try this year. One of the recipes I came across was for Curried Green Tomato Sauce from Ann Gardon’s book “Preserving for All Seasons.” After a bit of research, I discovered that tomatillos have a flavor quite similar to that of unripe tomatoes with a decidedly citrus-y twist. It seemed like it wouldn’t be too much of a stretch to substitute tomatillos for the green tomatoes. With a few minor tweaks, I was quite pleased with the outcome.

Ingredients
1/4 Cup butter (or olive oil for a dairy free/vegan option)
2 Onions, diced
3 lbs Tomatillos, washed and cubed (do not peel or remove seeds)
4 Tbsp Curry powder
1 Tbsp Cumin
1 Cup Water
1/2 Cup Brown sugar
1/2 Cup Golden raisins
3-4 Tbsp Lemon juice
1 tsp Salt (or to taste)

Melt the butter over medium heat and saute the onions until soft. Stir in the curry powder and cook 3 minutes more. Add the remaining ingredients and simmer for 30 minutes, stirring occasionally.

This recipe makes 4 pints (8 servings). It can be canned or frozen for later use.

To can this, ladle the sauce into pint canning jars leaving 1/2 inch head space. Seal and process in a boiling water bath for 30 minutes or in a pressure canner for 10 minutes.

Serve over rice as a vegetarian meal or as a side with grilled chicken or fish.