Pumpkin Chocolate Chip Cookies (grain, oil, and refined sugar free; vegan)

Pumpkin Chocolate Chip Cookies

My favorite season is Autumn. Even though it’s only August first, I’m already looking ahead to cooler weather, colorful leaves, and the tastes of spiced apple and pumpkin. The orchards are just starting to sell their summer apples, and I’m looking forward to the fall varieties that are barely a month away. I’ll be spending my fall days picking apples, making and canning applesauce and apple butter, and canning pumpkin for cookies and pies.

Autumn

While I wait longingly for apple and pumpkin season, I decided to pick up some canned pumpkin and create something fall-inspired. Boyfriend is kind of picky when it comes to my healthy cookies. He’ll never turn down a cookie, but he can usually tell that they contain something…non-traditional. These were not only well-received, he gave them 4 forks out of 5 (which he reserves for only the most spectacular of foods)!

Gratuitous gooey melted chocolate picture. You're welcome.

Gratuitous gooey melted chocolate picture. You’re welcome.

Ingredients
1 1/4 Cup Cooked chickpeas, well-rinsed
1/2 Cup + 2 Tbsp Pumpkin
1/4 Cup Honey or maple syrup
1 tsp Baking powder
a pinch of Cinnamon
a dash of Nutmeg
a pinch of Salt
1/2 Cup Semi-sweet chocolate chips**

Preheat the oven to 350°F.

Combine all ingredients, except chocolate chips, in a food processor and process until very smooth. Scrape the top and sides and process again until fully combined. With a rubber spatula, fold in the chocolate chips. Refrigerate the dough for 10-20 minutes until firm.

Form the dough into 1½” balls. Place balls of dough onto a Silpat or parchment paper lined cookie sheet. Press down with fingertips or the back of a wooden spoon to flatten (about 1/2 inch thick). Bake for about 15-18 minutes.

These cookies will not rise and will generally hold their round shape. They have a soft, slightly cake-like texture.

**These can be made vegan by using vegan chocolate chips.

Adapted from Peanut Butter Chocolate Chip Cookie Dough Bites.

Oatmeal Chocolate Chip Cookies (Vegan; wheat, oil, and dairy free)

Oatmeal Chocolate Chip Cookies
I absolutely love to bake. I also love to eat the results. What I don’t love is the way most baked goods make me feel. Wheat brings on a major allergy attack reminiscent of the peak of pollen season and often starts an argument between my tummy and I. It is simply not worth it. When I first realized that I needed to cut out wheat, I thought that I would have to spend a ton of money and time learning to bake with exotic flours. I was beyond wrong.

My first clue that I was thinking about wheat-free baking in completely the wrong way was this recipe by Erin over at Texan Erin Baking. It didn’t contain flour of any kind and relied wholly on cooked chickpeas, a staple in my kitchen. Erin mentioned that she had tried an oatmeal variety, but they didn’t work at all. I kept researching and eventually came across this recipe on Carrots ‘n’ Cake. The recipe looked great, but I wasn’t thrilled with the ratio of oil and sugar to other ingredients.

Eventually, using the knowledge I gained from Erin’s cookie recipe and a few experimental variations, I came up with the recipe below. Thanks to both Tina and Erin for the inspiration!

Ingredients
1/2 Cup Cooked chickpeas, rinsed and drained
1/2 Cup Oat flour
1/2 Cup Rolled or quick oats
1/2 Cup Brown sugar (or 3 Tbsp maple syrup; if using maple syrup, reduce applesauce to 3 Tbsp)
1/2 Cup Unsweetened applesauce
2 tsp Vanilla extract
1/2 tsp Cinnamon
1/2 Cup Chocolate chips (or raisins)

Preheat the oven to 350°F.

Place all ingredients, except chocolate chips into a food processor and blend until combined. Fold in the chocolate chips. Scoop the dough by tablespoons onto a silpat or parchment paper lined cookie sheet. Flatten slightly with the back of a spoon.

Bake for 18 to 20 minutes. Allow to cool before serving. (I admit it…I can never wait. These are awesome straight from the oven!)

Healthy Chocolate Chip Cookie Bites (PB and Nutella flavors)

Photo from www.texanerin.com

This photo by Erin of texanerin.com was all but irresistible!

I found an amazing recipe on Pinterest about two months ago for Grain-Free Peanut Butter Chocolate Chip Cookie Dough Bites (flour, oil, and refined sugar free). These awesome cookies use chickpeas, and since I think chickpeas are pretty cool little beans, this recipe was definitely pin-worthy…but since I don’t bake often they fell off of my radar. Then, about a month later, friend after friend shared these on facebook and I figured it was time to take the plunge.

The original recipe calls for natural peanut butter, but Boyfriend is allergic so I made my own cashew butter to use instead because I had a ton of cashews in the pantry. I hear it’s cheaper to make your own too (BONUS!). For instructions for making your own peanut or cashew butter, Erin over at Texan Erin Baking has a great tutorial here.

Cookies

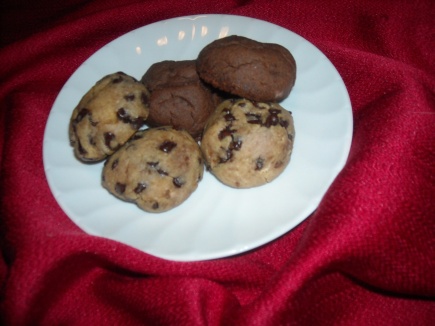
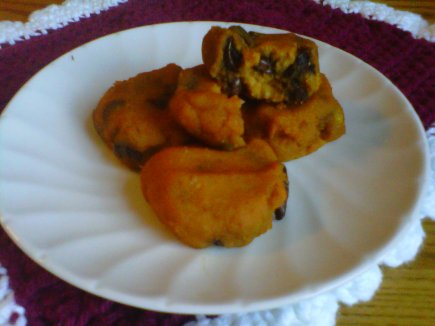
When I made them the first time, I was instantly in love…warm, gooey, chocolatey…heaven. They’re not perfectly healthy, but they sure beat my old Tollhouse recipe and I think they might be even more delicious! After one successful attempt, I started wondering about all of the ways that this recipe could be modified and remembered Nutella. I’m still working on an oatmeal chocolate chip variety, a cranberry white chocolate variety, and a cocoa peanut butter chip (Reese’s) variety. Both the original and Nutella versions are below. Scroll to the bottom for the Nutella version.

Cookie Close-up

The original recipe had lots of hints and tips, including the following (plus a few of my own):

  • Chickpea flour won’t work
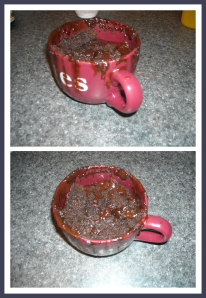
  • This will burn out less powerful blenders (I’ve done it successfully, but it requires lots of scraping and it’s definitely at the upper limit of my blender’s capabilities)
  • Do not add eggs, dairy, or flour to this recipe; it will not work
  • These are best eaten warm; to reheat them, put them into the microwave on high for 10 seconds.
  • These can be made dairy free by using vegan chocolate chips and homemade Nutella (store bought contains milk)
  • They can be made grain free by substituting the baking powder with 1 part cream of tartar + 1 part baking soda + 2 parts arrowroot
  • These can be made ahead, rolled into balls, and frozen for a quick treat later. Just place the desired number onto a cookie sheet and bake as described

Peanut Butter Chocolate Chip Cookies

Ingredients
1 1/4 Cups(230 grams) cooked chickpeas, well-rinsed and patted dry with a paper towel
2 tsp vanilla extract
1/2 Cup + 2 Tbsp natural peanut butter, cashew butter, or almond butter
1/4 Cup honey or agave syrup (or 30 drops Stevia)
1 tsp baking powder
a pinch of salt if your peanut butter doesn’t have salt in it
1/2 Cup chocolate chips

Preheat the oven to 350°F.

Combine all ingredients, except chocolate chips, in a food processor and process until very smooth. Scrape the top and sides and process again until fully combined. Add the chocolate chips and pulse the food processor a few times. The mixture will be very thick and sticky. Refrigerate the dough for 10-20 minutes until firm.

With wet hands, form the dough into 1½” balls. Place balls of dough onto a Silpat or parchment paper lined cookie sheet. Bake for about 10 minutes.

These cookies will not rise and will generally hold their round shape.

Nutella Chocolate Chip Cookies

Ingredients
1 1/4 Cups(230 grams) cooked chickpeas, well-rinsed and patted dry with a paper towel
2 tsp vanilla extract
1-2 Tbsp natural peanut butter
3/4 Cup Nutella (to make your own, go here)
1 tsp baking powder
1/4 tsp salt
1/2 Cup chocolate chips

Preheat the oven to 350°F.

Combine all ingredients, except chocolate chips, in a food processor and process until very smooth. Scrape the top and sides and process again until fully combined. Add the chocolate chips and pulse the food processor a few times. The mixture will be very thick and sticky. Refrigerate the dough for 10-20 minutes until firm.

With wet hands, form the dough into 1½” balls. Place balls of dough onto a Silpat or parchment paper lined cookie sheet. Bake for about 10 minutes.

These cookies will not rise and will generally hold their round shape.

Homemade Brownies (that taste like a mix!)

Brownies

I feel compelled to admit that I hate homemade brownies. I am usually at the front of the line when I hear the words “homemade” and “baked goods” together, but you couldn’t pay me to eat a homemade brownie! Those who grew up with homemade brownies don’t know any better; they have no idea what they’re missing. We who grew up with boxed mixes know better. We know the deep chocolatey flavor, the rich fudgy texture, the firm chewy edges. We know what a brownie can be, and poor homemade just can’t hold a candle to its deliciously sophisticated boxed cousin.

When I get together with my closest friends, I often make brownies. They’ve become accustomed to eating slightly scalding, but deliciously gooey, cupcake brownies or the even more popular “pile-o-brownie” (too impatient to let them cool, we scoop them out of the pan in scrumptious piles of molten brownie fudge). This wondrous delight comes from a boxed mix…Betty Crocker’s Ultimate Fudge Brownies with Hershey’s Fudge and Melt-away Chips.

Once I decided to start eliminating processed foods from my life, my wondrous brownie mix was one of the first to go. Farewell my fudgy chocolate friend; I shall miss you. Then I realized that I wouldn’t be the only one losing out. How could I tell my friends that their favorite brownie goodness was gone forever? Well, frankly, I couldn’t. The only solution was to find a recipe for homemade brownies that could match everything I loved about that wonderful mix.

I searched and searched until I found several brownie recipes, like this one on Fake-It Frugal, claiming to replicate boxed mix brownies, so I decided to try them. The first step was to create my own fudge, which I did here in a dark chocolate variety. Then I started trying out the recipes. The first was a complete and total failure. The batter was more like oily cookie dough and the brownies were as hard as rocks when they finished baking. Fake-It Frugal’s mix came second, and it was almost perfect. You’d never know by tasting it that it wasn’t from a mix.

Hang out nights are saved!!!

And so, dear reader, if you are in love with boxed mixes like me but not with all of the additives, this will save your brownie-loving soul.

Ingredients:
1 Cup Sugar
1/2 Cup Flour
1/3 Cup Cocoa
1/4 tsp Salt
1/4 tsp Baking Powder
**Prior to adding the wet ingredients, you can store your mix for quick baking later in a zip-loc bag or canning jar.
2 Eggs
1/2 Cup Vegetable Oil
1 tsp Vanilla
3 Tbsp Fudge sauce

Dry Ingredients Close-up

Batter and Tin


Preheat the oven to 350°. Combine the sugar, flour, cocoa, salt, and baking powder in a large mixing bowl.** Whisk to combine. Add the eggs, vegetable oil, vanilla, and fudge and stir until just moistened; do not overmix. Bake for 20-25 minutes in a 9 x 9 pan.

Adapted from Fake Betty Crocker Brownie Mix.

Minute Brownie in a Mug

I absolutely love brownies. I can’t stand having a whole pan of them sitting around the house. This is the perfect solution! Boyfriend only gives this one 4 forks because it’s so rich.

Brownie with Whipped Cream

This recipe is amazing. I microwaved it for 65 seconds in an 1100 watt microwave and it came out with a fudgey molten center. 75-80 seconds would result in a firmer brownie. Be careful not to overcook it. (Since it has no eggs it only needs to get warm enough to taste good.)

Ingredients:
2 Tbsp butter, melted
2 Tbsp warm water
1/4 tsp vanilla extract
1 dash salt
4 Tbsp granulated sugar
2 Tbsp unsweetened cocoa powder
4 Tbsp all-purpose flour

Directions:

In a 12 oz coffee mug, melt the butter; add the water, vanilla, and salt. Mix well. Add cocoa powder, sugar, and flour; mixing well after each addition.

Microwave for 60 to 90 seconds. The center should be slightly molten; be careful not to overcook it.

Enjoy it with a bit of fresh whipped cream. Be careful; as with most microwave magic, the center will be hot enough burn a hole through your tongue.

NOTES:
I served mine with homemade whipped cream (put up to a 1/4 C heavy cream and a small amount of sugar to taste in a blender and blend until stiff) and some homemade hot fudge. If your microwave is a lower wattage, you’ll probably have to cook it a bit longer to get a fully cooked brownie.

Inspired by this recipe by Wheres_the_beef?

Egg-free Brownie Batter and Cookie Dough (for snacking)

A few months ago my roommate taught me about “National Fail Day,” a day when absolutely everything you try to do fails to come to fruition. About a week ago, I ‘decided’ to celebrate my own “National Fail Day”.

I started my day with an argument, burnt my breakfast, couldn’t find the paperwork to renew my driver’s license, missed an appointment, and had my phone die mid conversation. That all happened before breakfast! On days like “National Fail Day,” sometimes you just need something awesome to help make up for it all. A single serving of Egg-free Brownie Batter or Cookie Dough did just the trick!

Cookie Dough

For both of these recipes, mix all of the ingredients in a coffee mug and enjoy the results with a spoon!

Brownie Batter

Ingredients:
1 tablespoons butter, melted
1 tablespoons water
1 dash teaspoon vanilla extract
1 pinch salt
2 tablespoons granulated sugar
1 tablespoons unsweetened cocoa powder
2 tablespoons all-purpose flour

Whisk together the butter, water, extract, and salt. Add the sugar, cocoa powder, and flower and stir until combined.

Cookie Dough

Ingredients:
1 Tbsp Butter
1 Tbsp Granulated White Sugar
1 Tbsp of firmly packed Dark Brown Sugar
3 Drops of Vanilla Extract
Small Pinch of Kosher Salt
1-1 1/2 Tbsp Milk
Scant ¼ C of All Purpose Flour (slightly less than ¼ of a cup)
2 heaping Tbsp of Semi Sweet Chocolate Chips

Combine the butter, sugars, vanilla extract, and salt. Add the milk and stir to combine. Add the flour and continue stirring until fully incorporated. Add chocolate chips.

Nutella Mug Cake

Now that the weather is nice and the chance of winter weather is all but gone, it’s time for spring cleaning. We have wonderful mats in our entry way that trap the water and sand so we don’t track it through the house all winter long. Unfortunately, they haven’t been cleaned since some time in January. I pulled them up, and the floor underneath was absolutely caked with dried winter sludge. I swept up as much as I could, but parts of the floor still had a thick layer of the muck. After the first mopping, I took a break to let it dry and thought I’d make myself a treat to pass the time.

Image of Nutella Mug Cake by live love pasta

Doesn’t that look beautiful? As soon as I saw it on live love pasta, I knew that I had to try it. After making Nutella Filled Banana Muffins last weekend, I had half of a jar of Nutella floating around, so I ran out of excuses not to make some.

Ingredients:
4 tablespoons self-rising flour
4 tablespoons sugar
1 egg
3 tablespoons cocoa powder
3 tablespoons Nutella
3 tablespoons milk
3 tablespoons vegetable oil

Whipped cream, if desired
½ cup heavy cream
1 tablespoon sugar

Batter

Combine all ingredients in a large coffee mug. Whisk well with a fork until smooth. Microwave on high for 1½– 3 minutes. (Time depends on microwave; mine took 1½ minutes.)

Nutella Cake Fail
This is how mine turned out. It doesn’t exactly have the souffle quality of the one above. It certainly rose, right out of my giant mug! The recipe calls for a large mug, so I used my extra large 11 ounce cafe style college mug. If this won’t hold it all, I don’t know what will. I would actually recommend splitting this batter into two mugs and watching it carefully in the microwave. If it looks like it’s going to overflow, pause it to let it settle a bit and then continue cooking. Despite its forlorn appearance, it tasted as good as that first picture looked!


Add heavy cream to the bowl of a stand mixer fitted with a whisk attachment and whip on medium-high speed until almost stiff. Add sugar and beat until heavy cream forms stiff peaks. Top Mug Cakes with whipped cream and a little chocolate sauce, if desired.

Nutella Filled Banana Muffins

In college, my friends introduced me to Nutella with waffle pretzels. They were shocked and amazed that I had survived for nearly 30 years without ever tasting the delicious chocolatey hazelnut goo. I was hooked on first taste. However, my Nutella instruction was far from over. They taught me all of the wonderful ways that it could be eaten, by dipping strawberries in it, spreading it on toast, covering a banana, scooping it straight by the spoonful. My favorite combination was definitely Nutella spread on a banana.

Banana Muffins

I absolutely love quick breads like zucchini bread, apple spice bread, and banana bread. With that in mind, I was sure that if bananas and Nutella were good together, banana bread and Nutella would be even better. I made a batch and Boyfriend was a huge fan. I took the rest of the batch to work with me, and they were gone almost as soon as I brought them in the door.

This past week, I found myself with half a dozen bananas that were more ripe than we’ll eat here (I like them still a bit green and Boyfriend doesn’t like them with more than a few small brown spots). Banana bread seemed like the perfect solution. Boyfriend and I are taking an Advanced EMT class together, so I decided to double the batch of muffins and take them to class. I didn’t bring any home.

Nutella Banana Muffins

I am still working on making everything from scratch, and finding an acceptable recipe for Nutella is on my list. For now, though, I used the store-bough stuff.

Ingredients:
1-1/2 C all-purpose flour
1 C sugar
1 tsp baking soda
1/2 tsp salt
3 medium ripe bananas
1 egg
1/3 C vegetable oil
1 tsp vanilla extract
1/2-1 C Nutella

Preaheat the oven to 375°.

In a large bowl, combine dry ingredients. In another bowl, mash the bananas. Add egg, oil and vanilla; mix well. Stir into the dry ingredients just until moistened. Fill greased or paper-lined muffin cups half full.

Bake for 18-22 minutes or until a toothpick inserted near the center comes out clean. Cool for 10 minutes; remove from pan to a wire rack to cool completely.

Fill a pastry bag with Nutella. (I prefer a size 5 round frosting tip for filling my muffins.) Insert the top half of the tip into the first muffin. Squeeze the bag gently just until the top of the muffin starts to bulge. Then pull the tip out of the muffin and move onto the next. Repeat until all of the muffins have been filled.

Yield: 1 dozen.

TIPS: Store-bought Nutella gets a bit thick after it has been opened. If yours is too thick, microwave it for 15-30 seconds (no more than 15 at a time) until it thins slightly. If you must stack these for storage or transportation, place a piece of parchment paper between each layer.

Chocolate Chip Cookie in a Mug

Occasionally, I want a sweet treat without any commitment. I mean, I’m not looking for a long-term relationship here. I just want a one night stand, a fling, and then I want to return to my lovely relationship with whole foods and healthy fruits and vegetables. All too often I fail, making a whole two-layer cake (like the one currently sitting on my counter wondering why I’m neglecting it) or an entire batch of brownies that I have to face day after awkward day. Every once in a great while, though, I find something wonderful that satisfies my craving without all of the leftovers. This is one such recipe.

Who can turn down a still warm chocolate chip cookie? Even better, who can turn down a chocolate chip cookie that takes less than 5 minutes to make and doesn’t expect a commitment? Thanks to No. 2 Pencil for the inspiration!

Cookie Dough

Ingredients:
1 Tbsp Butter
1 Tbsp Granulated White Sugar
1 Tbsp of firmly packed Dark Brown Sugar
3 Drops of Vanilla Extract
Small Pinch of Kosher Salt
1 Egg Yolk (discard the egg white or save for different recipe)
Scant ¼ C of All Purpose Flour (slightly less than ¼ of a cup)
2 heaping Tbsp of Semi Sweet Chocolate Chips

Cookie in a Mug

Start by melting your butter in the microwave; the butter should just be melted, not boiling. Add the sugars, vanilla and salt and stir to combine. Separate your egg, adding only the yolk to your cup, and stir to combine. Measure a scant, slightly less than full, ¼ cup of all-purpose flour, add it to your mug, and stir to combine. Add the chocolate chips, and give it a final stir. Now your mixture should look like cookie dough.

Cook in the microwave for 40-60 seconds, start checking for doneness at 40 seconds. Mine took about 45 seconds. Do not cook past one minute, just like a regular cookie, this will continue cooking as it cools. Serve warm, possibly with a bit of vanilla ice cream and hot fudge or caramel sauce.

Dark Chocolate Hot Fudge Sauce

I am on a quest…a quest to replicate my favorite brownie mix, Betty Crocker Ultimate Fudge Premium Brownie Mix with Hershey’s. I am famous for these brownies. I’ve been making them for several years, baking them in cupcake tins and serving them still warm; they quite literally melt in your mouth. I’ve also been known to bake them in a square cake pan and serve warm “pile-of-brownie” because I can’t wait long enough for them to cool before attempting to cut and serve them.

Now that I am working to eliminate processed foods and unnecessary chemicals from my diet, my poor brownie mix is out of the question (much to the disappointment of my friends). Unfortunately, I hate homemade brownies. I find them too cake-like, dry, and flavorless. However, I am bound and determined to find a solution. My friend, Roland, has been waiting for brownies since well before I began eliminating processed food, and I can’t let him down now.

My first task in my brownie-making quest was to replicate the fudge sauce. My favorite boxed mix includes a packet of fudge sauce and melt-away chocolate chips. I can live without the chips, but the fudge sauce makes so much difference in the texture and flavor. I found this recipe for Hershey’s Hot Fudge Sauce from MasterCook and decided to give it a try. This recipe makes approximately 2 1/2 cups; it just fit in a pint-sized canning jar.

Fudge Sauce in a Jar
Ingredients:
3/4 C Sugar
1/3 C Light corn syrup
1/2 C Hershey’s cocoa (I used Special Dark for this one)
1/3 C Butter
5 oz Evaporated milk
1 tsp Vanilla

Simmering Chocolate Sauce

Combine sugar and cocoa in small saucepan; blend in evaporated milk and corn syrup. Cook over medium heat, stirring constantly, until mixture boils; boil and stir one minute. Remove from heat; stir in butter and vanilla. Serve warm.

Butter and Vanilla

I put mine in a sterile canning jar, allowed it to cool, and stored it in the refrigerator.

ENJOY!